When it comes to sharpening knives, it’s important to know that there are several methods and tools available to sharpen your Viking scramasaxes: sharpening stones or an electric sharpener.
It’s also possible to delegate this task to a professional in the field. The best technique for sharpening a knife depends on various factors: the type of knife, the steel, your expertise in this area, and the desired result.
Without further delay, let’s present the different methods for sharpening your knives. Then, we’ll provide a detailed guide on the best way to sharpen knives according to our Viking heritage.
Sharpening Methods and Tools :
Method 1 : Electric Sharpener

Using an electric sharpener. Quality electric sharpeners are an option, but I strongly discourage their use. Firstly, they remove a significant amount of material from your blade. After sharpening your knife a dozen times, you will have lost a good half-centimeter of width, which unbalances it and makes any knife with a bolster (i.e., most high-end forged blades) useless. Secondly, even the best models only provide an adequate edge. If you don’t mind replacing your knives every few years and are satisfied with the edge they give you, they will suffice.
Method 2 : Call an Expert Sharpener

Entrust your knife to a professional. This is a good option, provided you have a good knife sharpener nearby and are willing to pay for the service. If you plan to sharpen your blades a dozen times a year, as I do, this can become quite costly. All professionals, except the best ones, also use a sharpening stone which, again, will remove much more material than necessary, reducing your blade’s lifespan. Want to forge a stronger relationship with your blade ?
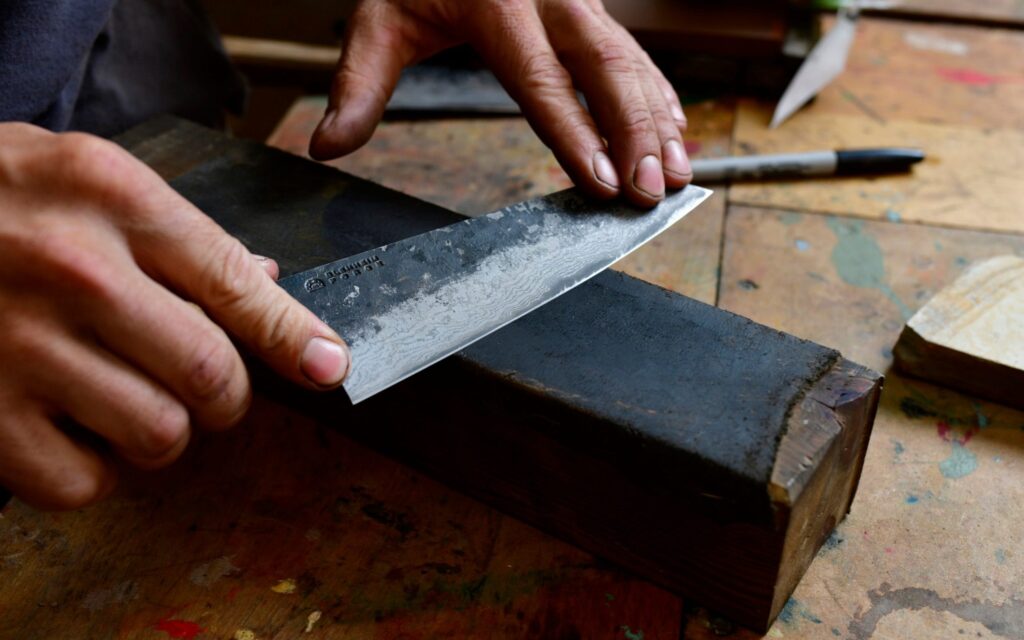
Method 3 : The Viking Method – The Sharpening Stone

Use a sharpening stone. This is by far the best method. Not only will it give you the best edge, but it also removes the least amount of material. With a fine enough grit, your knife should be able to shave hairs off your arm when you’re done. Moreover—and I’m not joking about the importance of this point—the act of sharpening your knife helps you create a much stronger bond with your blade, and a knife treated with respect will perform much better for its owner. The only problem? It takes some know-how. That’s where we come in. Get some sharpening stones (also called whetstones), follow the instructions, and practice. You won’t believe the difference a well-sharpened knife can make in your Viking kitchen.

We recommend using sharpening stones if you want to achieve the best edge possible, just like your Viking ancestors did. We’ve prepared a step-by-step guide to explain how to sharpen your knife. So, you have no more excuses !
Step-by-Step Guide for Sharpening Knives Using Sharpening Stones
After purchasing your scramasax or handmade Viking knife, selecting the equipment to maintain them is just as important. It’s common for a knife to cut even better after proper sharpening than when it was new. This is because the artisan doesn’t have the time to refine the sharpening.
Don’t be confused by these complex terms: honing, deburring, stropping, grinding… Know that at the beginning, the creation of a cutting edge involves removing material (very abrasive stone, tungsten sharpener) to maintain it.
This step-by-step guide will explain how to sharpen your knives using sharpening stones.
Step 1 : Choose the Appropriate Grit for Your Sharpening Stone
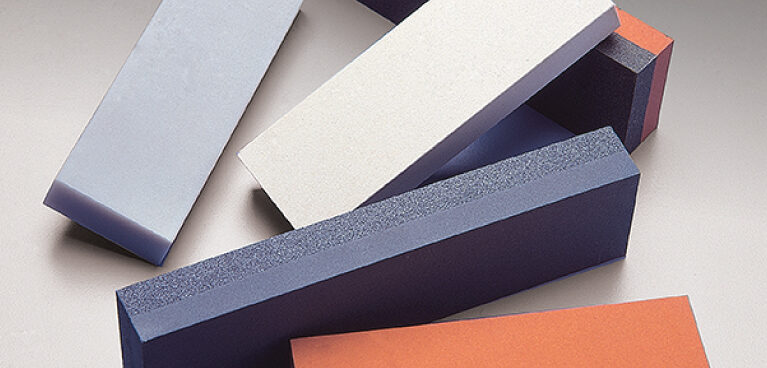
Selecting the right grit for your sharpening stone is an essential step in sharpening your blade. Not all blades need to be sharpened with the coarsest stone; on the other hand, it’s impossible to sharpen a dull blade with your finest stone, as it would be a waste. By starting with the appropriate grit, you’ll quickly achieve the perfect edge. If your Viking dagger is very dull or the blade is nicked, start with your coarsest stone. It quickly removes material, allowing you to refine a dull edge. However, always follow a coarse stone with a finer stone to polish the edge. If your genuine Viking knife is only slightly dull and needs a quick touch-up, starting with a medium or fine stone can save you time. Starting on the right stone will help you skip steps, but don’t use it on one side only, which requires little work.
Step 2 : Choose the Correct Sharpening Angle
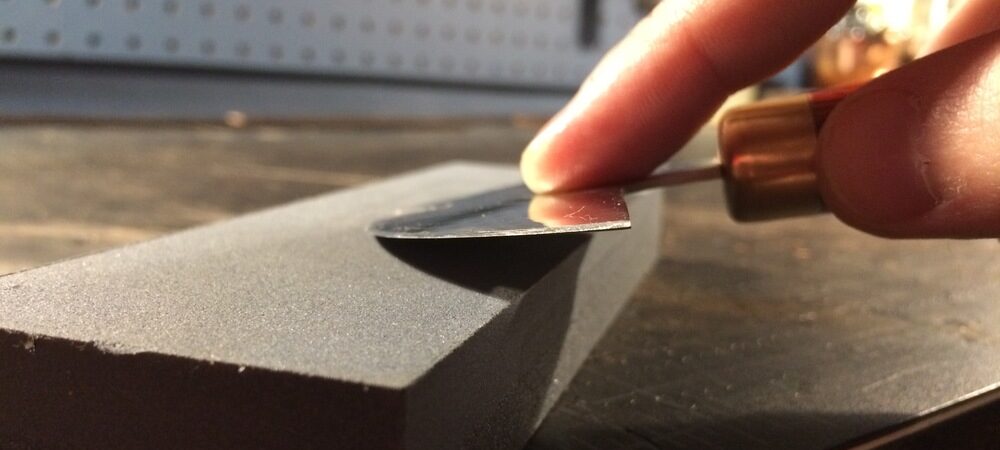
Selecting the right sharpening angle is the next step in sharpening. For more detailed instructions on choosing the right angle, try reading this article. Regardless of the sharpening method, it’s important to select an appropriate angle. This angle doesn’t need to be exact, but it’s good to follow some general guidelines. Most knife manufacturers recommend an angle of about 20 degrees. Depending on your knife’s use, you can increase or decrease this angle. A fillet or slicing knife is never used on hard objects, so a slightly lower angle will produce a sharper edge. Conversely, a survival knife used for various purposes may benefit from a more durable edge with a slightly higher angle.

Step 3 : Apply Water or Oil to the Stone
Water is essential for various stones, while others require oil to float the chips (small metal filings created during sharpening). Simply apply some of either to the sharpener. (We recommend using a cheap spray bottle to apply water.) The type of stone dictates the kind of lubricant you need. Water and diamond stones require H2O.
Step 4 : Sharpen the Knife
Start with the coarsest stone necessary for your knife, then move to each finer stone until you reach the desired level of sharpness.
Place your blade on the stone at the chosen angle. Take half of the 45-degree angle after visualizing it. This way, you’ll have an approximate estimate and can adjust based on your vision.
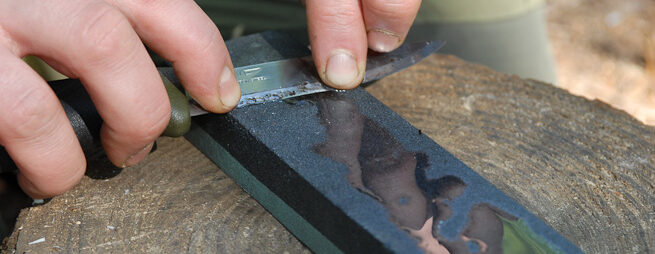
With a desire to slice, place the knife length on the stone, pressing firmly on the blade with a process starting with the knife’s heel on the stone and ending with the knife’s tip. The swing should mimic an arc on the stone. Be very careful to maintain the blade’s angle on the stone, following the motion perfectly. Longer and curved Viking scramasaxes pose additional challenges, but if you maintain the angle well, nothing will stop you; knife sharpening is very effective. Repeat this process on the other side of the blade and don’t stop until you’ve sharpened your knife on all the grits of your stone.
Another Method for a Very Dull Knife
A dull knife requires a coarse stone and may need more time on the stone. As this may require many passes, we suggest taking up to 10 passes before alternating sides.
How to Know When You’ve Finished Sharpening with a Stone ?
An important but often confusing aspect of sharpening is knowing when you’re done with a stone and ready for the next finer grit. On coarse stones, it’s very easy. When you sharpen one side, you’ll notice a burr forming on the opposite side of the edge. This burr is hard to see but easy to feel. Carefully feel the burr by gently running your hand from the spine to the edge. (Don’t run your finger along the knife’s edge from heel to tip; you’ll only cause trouble.) A burr forms when your stone removes material directly at the edge. The burr moves from side to side of your knife as you alternate sharpening sides. Make sure you’ve felt the burr jump between both sides before moving to the next finer stone.

This ensures you’ve properly sharpened both sides. Finer grits follow the same process, but the burr is much smaller. On the finest grits, you may not notice the burr at all. Testing the knife’s edge will tell you when you’re finished.
Important: Learn How to Test If Your Knife Is Well Sharpened
How sharp should the knife be ?
In most cases, the sharper the knife, the better. The sharpness of your blade is determined by the angle (the lower the angle, the sharper the blade) and the fineness of the grit you choose for your final sharpening.

Since you’ve already determined your angle several times before, you only need to know what grit to stop at now. Again, this depends on the knife’s use. In most cases, go to the finest stone you have, as it will give you the best edge. The only exception would be a knife used to cut soft vegetables like tomatoes, as a slightly coarser edge will provide more teeth to facilitate cutting.