Exploring Different Methods and Techniques to Sharpen a Knife Without a Sharpener
Knife sharpening is a crucial skill for any cooking enthusiast or professional seeking to maintain effective cutting tools. While many cooking aficionados have dedicated sharpeners for this task, there may be times when you find yourself without this specific tool, whether you’re outdoors, traveling, or simply facing an emergency. In such circumstances, knowing how to properly sharpen a knife without a sharpener becomes a valuable skill.
Summary
ToggleWhether you’re a passionate chef or an adventurer seeking practical skills, you’ll find useful tips for keeping your knives sharp at all times, even when resources are limited. It’s time to dive into the art of manual knife sharpening.
Top Tips for Sharpening a Knife Without a Sharpener:
There may come a time when you need to sharpen your dull knives—whether it’s a kitchen knife—but you don’t have sharpening stones or other tools at hand. So, how do you sharpen a knife with nothing?
In this article, you’ll find 11 different tips and tricks to help you keep your knife sharp—tried and tested by yours truly. Sharpening a knife without a stone can be done effectively with this ultimate guide to knife sharpening.
How to Sharpen a Knife with a Coffee Mug
Did you know that you can use a coffee mug as a makeshift sharpening stone?
You might not have a mug on hand if you’re camping and need something to sharpen your dull knife, but it’s more than likely that you have one at home.
The surface of a coffee mug is usually smooth and polished, but the bottom is often rough to help the mug grip the table.
The texture can range from medium to fine, depending on the roughness of the mug’s bottom. This is what you can use to sharpen a knife when you don’t have other tools available.
If you don’t have a mug on hand, you can also use a bowl, a plate, or a similar ceramic item. Most ceramic objects can serve as makeshift sharpening stones for knives.

The Method :
Step 1: Take a coffee mug with a rough bottom—an entirely polished mug won’t work. Place the mug upside down on a hard, flat surface. If the surface is too slippery, you can place a cloth or a cutting board underneath the mug.
Step 2: Take your knife and position the blade at a 10-degree angle against the rough side of the mug.
Step 3: Make sure to maintain the same angle between the knife and the mug while drawing the blade along its entire length, just as you would when sharpening a knife without any tools. Flip the knife over and repeat the same steps on the opposite side of the blade.
Step 4: Repeat the process until you feel that your knife starts to sharpen.
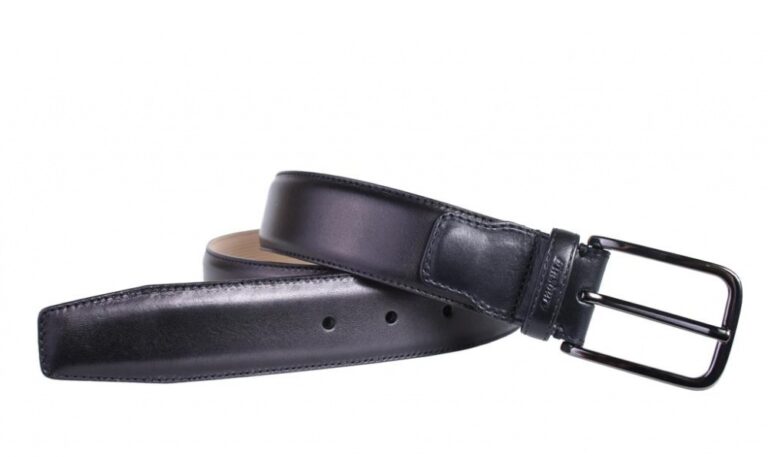
How to Sharpen a Knife with a Leather Belt
This method is more of a last-resort solution for sharpening a knife without specialized tools.
A leather belt—or perhaps a strap from a bag—can sometimes be useful if you need to sharpen a knife.
However, a leather belt (or a nylon strap) is generally more effective for removing the burrs created after the initial sharpening of the metal.
If you already have a well-sharpened knife, a leather belt will help maintain its edge. It’s not necessarily the best way to restore a dull blade, but it’s excellent for maintaining an already sharp knife.
Always use an old belt—rougher is better.
The Method :
Step 1: Take your belt and place it on a hard, flat surface. This will make it easier to keep the belt in place. Position the blade facing you and tilt it at a 10-degree angle.
Step 2: While maintaining the same angle on your knife, slide the blade along the belt, moving away from you. Cover the entire length of the blade in one continuous motion.
Step 3: Flip your knife over and slide the edge of the blade on the opposite side along the leather. Continue sharpening the knife for 10 to 15 minutes until you feel the blade becoming sharper. Work both sides of the knife evenly.
How to Sharpen a Knife with Sandpaper
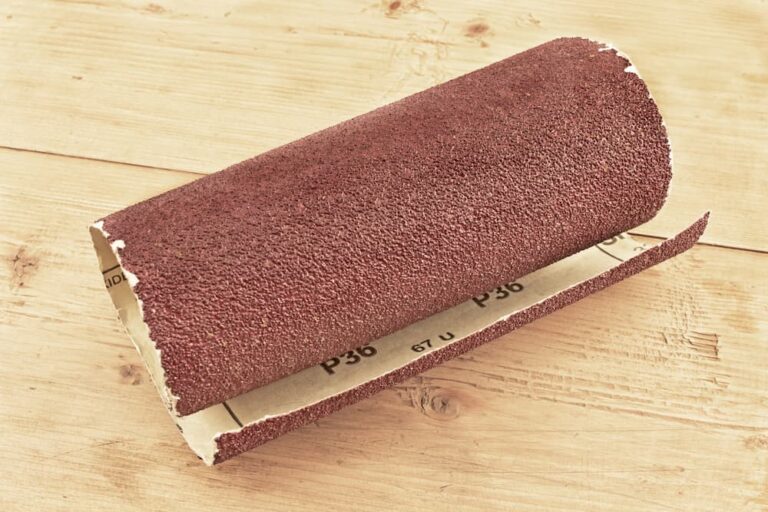
Sandpaper is a great makeshift knife sharpener, similar to a coarse sharpening stone.
By mounting the sandpaper on the back of a flat piece of wood, you create an excellent surface for sharpening a knife without a dedicated sharpener.
Method:
Step 1: Choose the right grit of sandpaper. Start with a coarser grit (such as 200 or 400) for initial sharpening, and then move to a finer grit (such as 800 or 1000) for polishing.
Step 2: Attach the sandpaper to a flat piece of wood using glue or tape. Make sure the sandpaper is smooth and securely adhered to the wood.
Step 3: Place the knife on the sandpaper at a consistent angle (usually around 15-20 degrees). Draw the blade across the sandpaper from the heel to the tip of the blade, applying even pressure.
Step 4: Flip the knife over and repeat the process on the other side of the blade. Ensure you maintain the same angle throughout.
Step 5: Continue sharpening and alternating sides until you achieve the desired sharpness.
Step 6: Finish by using a finer grit sandpaper if necessary to refine the edge and remove any burrs.
This method provides an effective way to sharpen your knife when traditional tools are unavailable.
How to Sharpen a Knife with a Nail File
Using a nail file to sharpen a knife is a fairly common trick. It’s a simple method for sharpening knives, and it’s quite likely that you already have one at home.
Similar to sandpaper, nail files are quite rough. This texture makes them an excellent tool for sharpening a knife without any specialized equipment.
This is a great trick if you don’t have anything else on hand—they’re small and lightweight, making them perfect to carry when camping or hiking, where you might need to sharpen a knife.
Méthod :
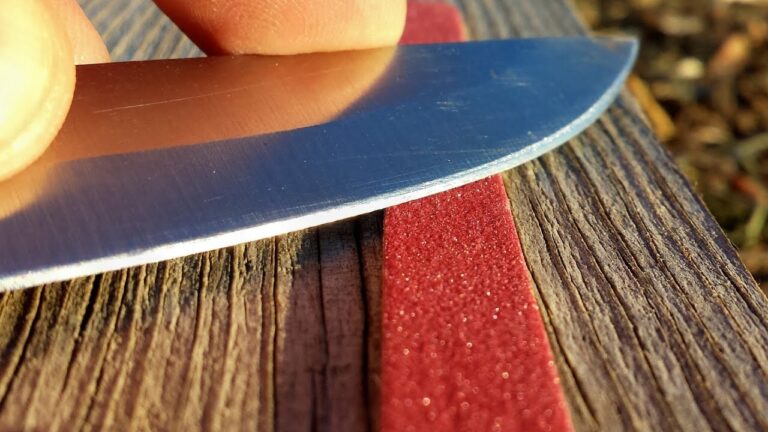
- Step 1: Place your nail file or emery board on a stable surface, such as a table or a large rock, with the rough side facing up. Take your knife and position it against the rough side of the file at a 10-degree angle.
- Step 2: With the blade oriented away from you, slide it along the entire length of the nail file. Make sure to cover the full length of the blade.
- Step 3: Flip the knife over and sharpen the other side of the blade using the same technique. Continue sharpening until you feel the blade is sufficiently sharp.
How to Sharpen a Knife with Another Knife
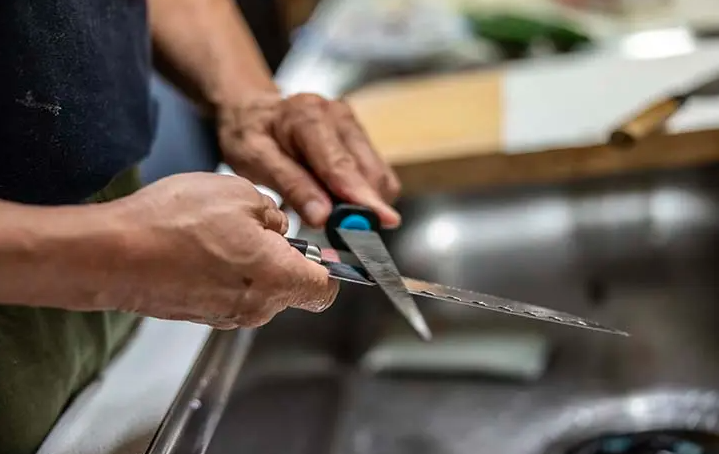
This trick allows you to kill two birds with one stone if you have two dull blades. Essentially, each knife serves as a honing or sharpening rod.
You may have heard that it’s not advisable to sharpen a knife with another knife. However, if done correctly, this method can be effective without damaging either blade.
The key is to never use the actual edge of your knife to sharpen another blade—this would just damage both knives.
Method :
- Step 1: Take two knives. Position the second knife with its back (the flat side) facing the blade you want to sharpen.
- Step 2: Hold the first knife (the one you want to sharpen) at a consistent angle (typically around 15-20 degrees) against the back of the second knife.
- Step 3: Draw the blade of the first knife along the back of the second knife from the base to the tip, applying gentle but consistent pressure. Make sure to cover the full length of the blade.
- Step 4: Flip the knife over and repeat the process on the other side of the blade.
- Step 5: Alternate sides and repeat the process until the blade is sharpened to your satisfaction.
- Step 6: Carefully check the sharpness of the knife and repeat the steps if necessary to refine the edge.
This technique can be useful in a pinch, but be mindful that it’s not ideal for maintaining the best edge over time.
How to Sharpen a Knife with a Car Window
Bear with me, I know this might sound odd. However, using a car window can be an effective surface for sharpening a knife when you don’t have any tools.
The surface may seem smooth, but the edge of the window is actually quite rough, as it hasn’t been polished. This edge can act as a sharpening stone for your knife.
You might find it a bit challenging to fit a car window into your backpack—and I don’t recommend sharpening your knife on a stranger’s car window.
But it can be a handy trick if you’re traveling with a dull knife in your pocket.

Method :
- Step 1: Locate the edge of the car window. The edge where the glass meets the frame is rough and can be used as a sharpening surface.
- Step 2: Hold your knife at a consistent angle (usually around 15-20 degrees) and place the blade against the rough edge of the window.
- Step 3: Slide the blade along the edge from the base to the tip, covering the full length of the blade. Apply even pressure and ensure you maintain the same angle.
- Step 4: Flip the knife over and repeat the process on the other side of the blade.
- Step 5: Continue this process until you achieve the desired sharpness.
- Step 6: Check the sharpness of your knife and repeat the steps if necessary to refine the edge.
This method is useful in a pinch, but keep in mind it’s not the most ideal or conventional way to sharpen a knife. Use this trick wisely and consider it a temporary solution.
How to Sharpen a Knife with a Flat Rock
This is one of the most practical methods for sharpening a knife when you have minimal tools, as you can simply pick up a rock during a hike.
Of course, a proper sharpening stone would be ideal, but any rough surface can help sharpen a knife.
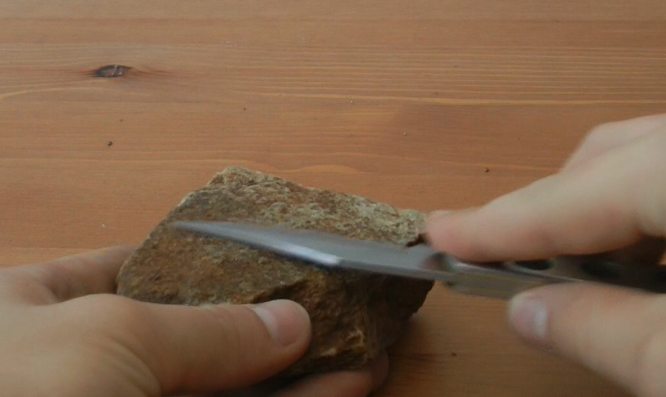
Look for a flat rock with a texture that is both smooth and rough. Wet the rock with water, just as you would with a sharpening stone for dull knives.
Method :
- Step 1: Find a flat rock with a relatively smooth and rough texture. Ensure that the rock is stable and won’t move around while you’re sharpening.
- Step 2: Wet the rock with water. This helps to reduce friction and carry away metal filings, similar to how you would use a sharpening stone.
- Step 3: Hold the knife at a consistent angle (typically around 15-20 degrees) and place the blade against the rough surface of the rock.
- Step 4: Draw the blade along the rock from the base to the tip, applying even pressure. Make sure to cover the full length of the blade in one continuous motion.
- Step 5: Flip the knife over and repeat the process on the other side of the blade.
- Step 6: Continue sharpening and alternating sides until you achieve the desired sharpness.
- Step 7: Check the sharpness of the knife and repeat the process if necessary to refine the edge.
This method is effective for sharpening knives in outdoor situations and serves as a temporary solution when traditional tools are unavailable.
How to Sharpen a Knife with a River Rock
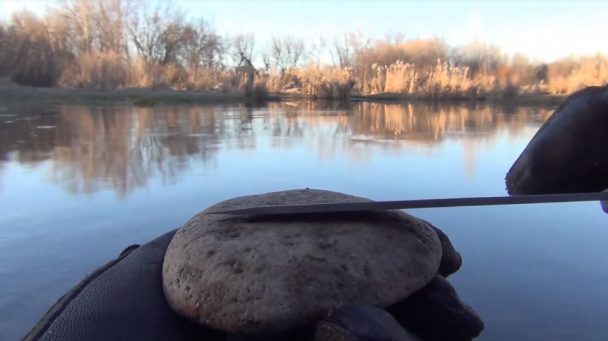
A river rock, or slate, is probably the closest you can get to a traditional sharpening stone. River rocks have the right consistency for sharpening a knife when you don’t have other tools.
Additionally, you can often find a suitable rock on the spot, eliminating the need to carry one with you.
Method :
- Step 1: Find a flat river rock or slate with a smooth yet slightly rough surface. The texture should be suitable for sharpening, similar to that of a sharpening stone.
- Step 2: If possible, wet the rock with a small amount of water. This helps reduce friction and carries away metal particles, making the sharpening process more effective.
- Step 3: Hold your knife at a consistent angle (usually around 15-20 degrees) and place the blade against the surface of the rock.
- Step 4: Draw the blade along the rock from the base to the tip, using long, even strokes. Apply gentle but consistent pressure.
- Step 5: Flip the knife over and repeat the process on the other side of the blade. Ensure that you maintain the same angle throughout.
- Step 6: Continue alternating sides and sharpening until you achieve the desired sharpness.
- Step 7: Check the knife’s edge and refine the sharpening as needed by repeating the process.
Using a river rock can be an effective method in outdoor settings and is a practical solution when traditional sharpening tools are not available.
How to Sharpen a Knife with a Broken Glass Bottle
As dangerous as it might sound, using a broken glass bottle can be a viable alternative to your usual sharpener for sharpening knives.
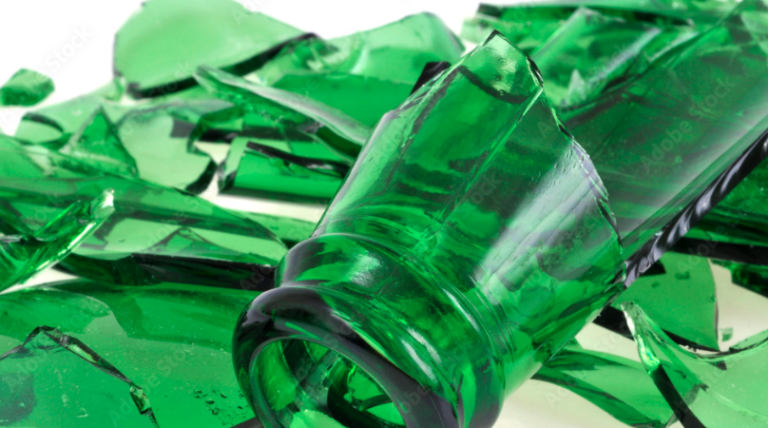
The reason this works is that the edge of a broken bottle is not polished, making it rough enough to sharpen your knife.
Of course, we do not recommend breaking bottles intentionally. A safer method to break a bottle cleanly is to soak a piece of string in acetone, wrap it around the bottle five times, light the string on fire for 30 seconds, and then plunge the bottle into cold water.
Method :
- Step 1: Carefully prepare your broken glass bottle. If you are using a bottle that has been intentionally broken, make sure the edges are jagged but not too sharp to handle safely.
- Step 2: Place the bottle on a stable surface, making sure it’s secure. Hold the knife at a consistent angle (usually around 15-20 degrees) against the rough edge of the broken bottle.
- Step 3: Slide the blade along the jagged edge of the bottle from the base to the tip, applying even pressure. Cover the full length of the blade with each stroke.
- Step 4: Flip the knife over and repeat the process on the other side of the blade, maintaining the same angle.
- Step 5: Continue alternating sides and sharpening until the knife reaches the desired sharpness.
- Step 6: Carefully check the sharpness of your knife and refine as needed.
Safety Note: Be extremely cautious when handling broken glass to avoid injury. Use protective gloves if possible, and ensure you are working in a safe environment. This method is a temporary solution and should be used with care.
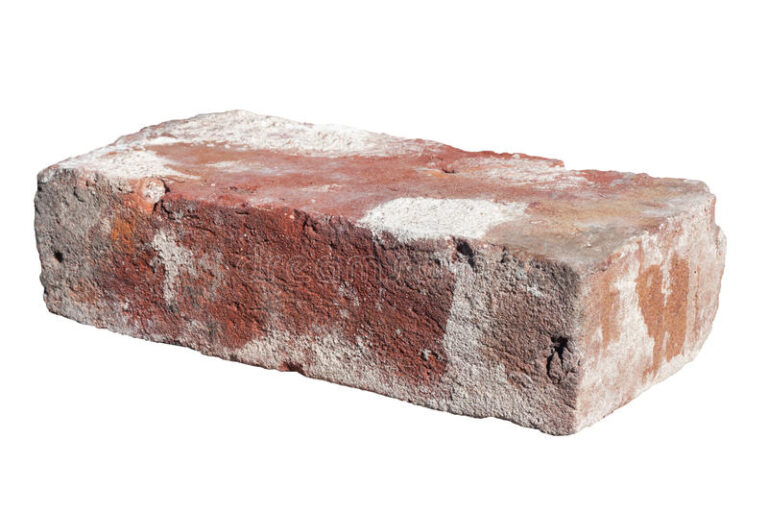
How to Sharpen a Knife with a Brick
A brick is quite similar to slate or a stone—two excellent alternatives to a sharpening stone.
Bricks are generally easy to find, so you don’t need to carry one with you.
You should look for a brick that isn’t too coarse or too smooth. A very coarse brick could damage your blade.
The method is exactly the same as with slate: always make sure to sharpen your blade on a stable surface.
Method :
- Step 1: Find a brick with a surface that is rough enough to sharpen the knife but not so coarse that it will damage the blade.
- Step 2: Place the brick on a stable surface, such as a table or a large rock, to prevent it from moving while you work.
- Step 3: Wet the brick slightly with water if possible. This helps to reduce friction and carry away metal particles, similar to using a sharpening stone.
- Step 4: Hold the knife at a consistent angle (typically around 15-20 degrees) and place the blade against the rough surface of the brick.
- Step 5: Draw the blade along the brick from the base to the tip, covering the full length of the blade in one continuous motion. Apply even pressure throughout.
- Step 6: Flip the knife over and repeat the process on the other side of the blade, maintaining the same angle.
- Step 7: Continue sharpening and alternating sides until you achieve the desired sharpness.
- Step 8: Check the sharpness of your knife and refine the sharpening process if necessary.
Using a brick is an effective method in situations where you need a makeshift sharpening tool and is a practical solution when traditional tools are not available.
How to Sharpen a Knife with a Shovel
Using a shovel as a sharpener is similar to using one knife to sharpen another. While you might not carry a shovel with you while hiking, you likely have one in your garage.
To sharpen your knife, you’ll use the top edge of the shovel (the part where you step) to sharpen the blade.
If your shovel is made of a solid material (stainless steel is better than aluminum), it will be easier to use as a sharpening tool.
The method of using a shovel to sharpen a knife is exactly the same as using another knife. The only difference is that you’ll use the footrest of the shovel for sharpening.
Method :
- Step 1: Find a shovel with a sturdy edge, preferably made of stainless steel for best results. Place the shovel on a stable surface.
- Step 2: Hold the knife at a consistent angle (around 15-20 degrees) and position the blade against the top edge of the shovel where you place your foot.
- Step 3: Draw the blade along the edge from the base to the tip, covering the full length of the blade with each stroke. Apply even pressure.
- Step 4: Flip the knife over and repeat the process on the other side of the blade, maintaining the same angle.
- Step 5: Continue alternating sides and sharpening until the knife reaches the desired sharpness.
Conclusion :
In conclusion, it is entirely possible to sharpen a knife effectively without a dedicated sharpener. By following appropriate methods and techniques—such as using a sharpening stone, leather, or even a ceramic cup—you can restore the blade’s sharpness satisfactorily. It is essential to take your time, approach the task meticulously, and maintain a consistent angle throughout the process. Ultimately, persistence and practice are key to successfully sharpening a knife without a costly sharpener. By learning and applying the right techniques, you can extend the lifespan of your knives while keeping their performance at an optimal level.

