Are you looking to make a knife handle, unsure of where to start, and what tools you need? And would you like it to be made of wood or deer antler?
Whether you’re an expert or a novice, don’t worry! The Viking Knife brings you this ultimate guide to crafting your knife handle to perfection!
What Should We Prepare Before Making a Knife Handle ?
Preparation is the key to the success of any project, and that applies to making a knife handle as well. So, you’ll need DIY skills to succeed in all the steps. This may involve both metallurgy and woodworking skills. You’ll need a spray booth for epoxy work, as detailed in our guide.
The first thing is to prepare the materials for the knife handle that you’ll need during the project:
- Blade
- Scales
- Pins
- Epoxy
Here’s what you need for the machinery:
- Use a band saw for wood and metal
- Scribe
- A drill press
- Sanders
- Files
- Pliers
- Knife handle oil
How to Make a Knife Handle ?
Now that you’re familiar with the different materials and preparations needed for making a DIY knife handle, let’s break down the step-by-step process for a successful project.
Choosing the Right Material for Making a Knife Handle
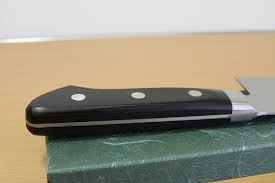
- Wood – the most versatile material suitable for both folding and heavy blades.
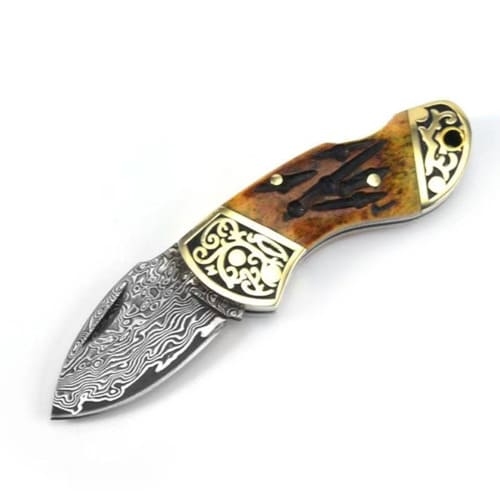
- Bone – an excellent choice if you want an elegant and durable knife.
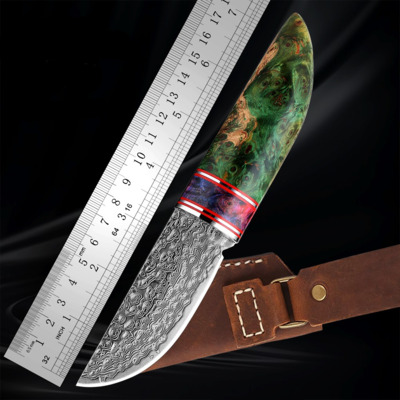
- Deer Antler – it uses natural deer antlers, making it both natural and unique.
- Aluminum – opt for this choice if you want a lightweight blade. A textured handle will reduce the risk of slipping.
- Stainless Steel – it’s corrosion-resistant and is often mixed with rubber for improved grip.
- G-10 – a thin material that is both strong and lightweight.
Before you begin, our suggestion is to eliminate any distractions. Make sure you have at least two hours to focus on this project. Once you master knife handle making, you’ll enjoy crafting and using your knives!
The Step for Making a Knife Handle :
1. Material Preparation and Cutting the Handle
In the previous section, we mentioned the materials and tools you need to prepare. If you have the items ready, lay them out on a flat surface. Arrange them properly so that you can easily access all the elements you need.
Here’s what you need to do in this step:
- Take masking tape and wrap it around the sharp edge of the blade. This will prevent any cuts while making the knife handle.
- The next step is to take the scales for your handle and cut them to the desired size. You want them to be square, but leave up to 2 cm of extra material for margin.
- Use a pencil or any marking tool to mark the edges of the blade on the scales. Feel free to place the knife and then mark around it.
- Next, power up your band saw and use it to make a vertical cut. It’s essential to leave up to half an inch of extra space. You will use the sanding process to make everything perfect, and we’ll discuss that later.
2. Drilling Pin Holes for the Knife Handle
An important thing to note when making a custom knife is that the handles you acquire already come with holes. This is a simplified method adopted by manufacturers. It sounds great. You need to buy a suitable pin. Try the pin to see if it fits in the hole. You may need to enlarge it if it doesn’t fit perfectly.
Here’s how to proceed:
- Take the scales and tape them together with adhesive tape. To place the knife handle on top, use the adhesive tape.
- To locate the pins, use a pencil. The holes must be carefully positioned, as this can affect the knife handle making.
- Choose a drill bit close in size to the pin but slightly larger. For example, you can use a 0.132-inch (3/16) bit if your pin measures 0.125 inches (1/8).
- Place the scales in the vise and start drilling. Start from the edges and move toward the central holes.

Viking Forge of Odin Manual Boning Viking Knife
3. How to Rivet a Knife Handle ?
Cut your pins to the desired length. It’s time to move on to the next step in making a knife handle, and it starts with assembling the handle. The outer faces of the pin should remain visible. Take a pencil and move along the long side to draw 1/8 of the pieces.
The next step is to cut the pins to the desired length. Remember that it’s easy to cut a little more. But if you cut too much of the pin, you won’t be able to make up for it.
What to Do If Your Knife Has Rivets ?
If this happens, your goal is to countersink the hole to the required depth. So, it’s best to take advantage of a caliper to measure the head of the rivet, which will determine the hole size to drill.
The piece of the scale that’s close to the edge of the blade needs to be drilled and shaped. The scales should still be symmetrical for the knife to have a pleasing appearance.
4. Choosing the Right Glue for Attaching a Knife Handle ?
Choose the right glue for your knife handle. The last thing you want is a handle that slips or breaks while you’re using it.
For this step, you’ll need to use a spray booth. Make sure to have some clamps with you and some paper.
The first thing to do is place the paper on a clean, flat surface. Place the pins in the holes you’ve prepared. You can assemble and disassemble the knife multiple times. This will help you quickly learn how to put a handle on a knife. Why is this important?
Once you’ve epoxied the handle, time will be of the essence. So, you’ll have little time to get everything right in terms of handle application.
5. Carving the Knife Handle
Sanding the handle of your blade to give it shape is the next step in making a DIY knife handle. To do this, start by planning the desired shape. Feel free to adapt it to your needs: do you want your homemade knife to have a thin or wide handle? Do you want a creative or specific shape?
There’s no reason not to start the filing process and decide at that moment. All you need is to use a belt sander, circular sander, or spindle sander. Start from the outer part and sand the material until it’s flush with the metal. If you’re using a circular sander, turn the handle to achieve the desired shape.
It’s up to you when to finish the process. However, make sure the pins don’t protrude—if they do, sand them as well.
6. Polishing the Knife Handle
We’re about to finish the project “How to Make a Wooden Knife Handle.” So, we still need to go through the polishing and finishing. Feel free to choose the desired polish and use sandpaper to act on it.
Experts recommend sandpaper with 400 to 600 grits. So, you can go beyond this limit if you want a perfectly smooth handle. Now, the process is simple—apply the polish, and use the sander.
Perform this process several times and apply another coat of polish. Let it sit overnight to see how it will look in the morning. Repeat this process if necessary.
Puukko Outdoor Knife with Wooden Handle
7. Making a Wooden Knife Handle Shine
It’s time for the final touches, so if you want to decorate the handle, now is the right time to do it. You can search online for wooden knife handle patterns or get creative yourself. In any case, remember to remove the masking tape from the blade so you can use it freely.
Knife Handles Made of Horn :
Is the process of making a knife handle from horn different from other materials? The imperative is to find this natural material as it is quite expensive and not easy to come by.
Discover the Steps to Making a Deer Antler Handle:
- First, prepare the handle by deciding on a position to cut the horn. The idea is to make it flush, and you can use a hacksaw. Don’t forget to smooth the edges once you’re done using the tool.
- Next, boil the deer antler in hot water. You can leave it in the bowl for 60 minutes (remove from heat). The idea is to soften the material.
- Thirdly, use a vise to secure the blade, and don’t forget the masking tape to prevent cuts during the process. Position the deer antler to place it on the tang. Let it dry overnight.
- Then, test if the grip is optimal. If it’s not firm, you can glue the tang and repeat the process.
Making a G-10 Knife Handle :
G-10 is another knife handle material you can use. Here’s a brief step-by-step guide for making a G-10 knife handle:
- First, use a Sharpie marker to mark the handle at the desired positions. You’ll need to mark the holes accurately.
- Next, take a hand drill to start drilling, and you can use a drill press to make the holes even.
- Use brass bolts as pins and assemble the handle. Use epoxy to glue the scales together.
- Additionally, clean up any epoxy residue and let it dry. Once you’ve done that, you can use sanding to get the desired shape.
How to Replace an Old Horn Knife Handle ?
Do you want to replace the handle of your wooden knife to adjust its aesthetics or does it seem too old and needs refreshing? Whatever the reason, replacing a handle should not be too difficult.
The whole process starts with removing the old handle. To do this, you can use a hacksaw or a similar tool. Before that, don’t forget to wrap the sharp end of the blade to avoid cuts during the process.
You can follow the knife handle making guides provided in this article. It all boils down to using proper holes for pins and connecting the handle correctly. If necessary, you can also consider sharpening the blade. Once you’ve finished revitalizing the item, the knife will be as beautiful and functional as new.
Folding Nordic Damascus Steel Knife with Hand-Carved Pure Brass Handle
Conclusion
If you’re making a knife handle, you have a variety of materials to choose from. This allows you to ensure that the product meets your requirements and preferences. While you’ll need to spend some time preparing the necessary tools and materials, the actual project won’t demand much time and effort.